 |
(View file PDF) |
- Product Title (Title). You cannot save the product if you don’t fill in a title.
- Product Code (Item Code). You cannot save the product if you don’t fill in a product code.
Here’s how to do it.
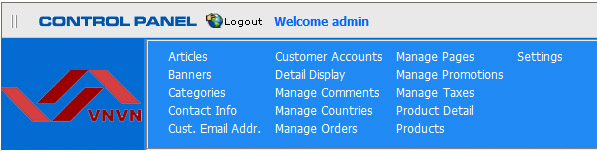
Login the Control Panel as usual. The first screen of the Control Panel looks like this.
A. Step 1: Add a product record. You will map to a category and upload product image in step 2.
- Click “Products” on the menu. The list of existing products will appear.
- Click the “Add new record” button at top of the list.

- Title. Fill in the box with the title of the product. At the end of this box, there’s a box named “Title case” and it is checked, as default. If this box is checked, the first character of all the words you type in here will become capital.
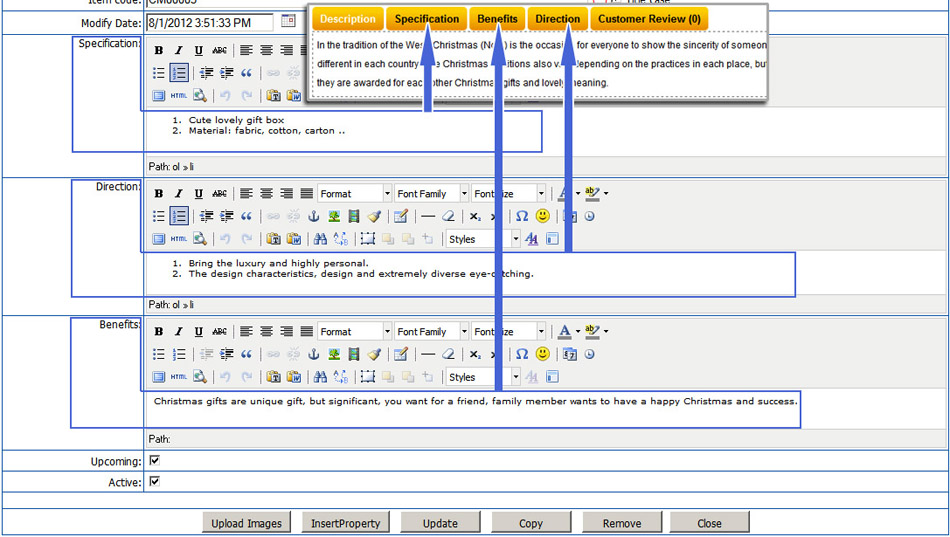
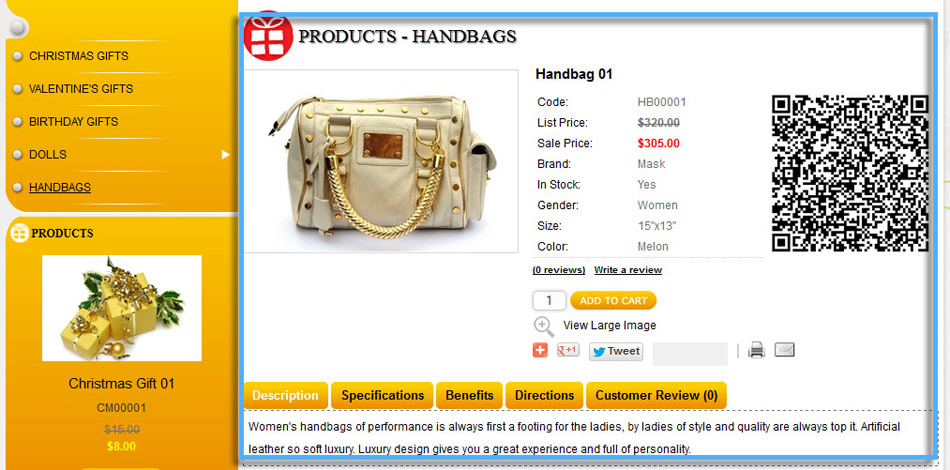
- Description. Fill in the description of the product. It will be displayed in the “Description” tab below the image of the product.
- In stock. Fill in the quantity of this product in stock. The default number is 10. Replace this number with the actual quantity. This number will be updated automatically when the product is ordered by customers.
- Brand (or Manufacturer). Fill in the name of the brand or the manufacturer of this product. Notes: Your website has the filtering function to display only products of a particular manufacturer. It helps your customer quickly find a product.
- List price. If your price is lower than the Manufacturer Suggested Retail Price (MSRP), you may want to fill in this box for the customer to compare.
- Sale price. Fill in the sale price.
- Weight. Fill in the weight of the product, only needed when you charge the shipping fee based on weight. The unit is pound.
- Color. Fill in the prominent color of the product. Notes: If your product comes in different colors, you need to add one record for each color.
- Size. Fill in the size (for example: S, M, L, XL, 28, 30…) or the dimensions of the product. Notes: If your product comes in different sizes, you need to add one record for each size.
- Gender. Specify if this product is for men or women’s use. Leave it blank if it is for both men and women. Notes: Your website has the filtering function to show only products for men or for women.
- Shipping fee. If you charge a fixed shipping fee for this product, fill in the fee, in US dollars, here.
- Shipping fee for each additional item. If you charge a different fee for the additional item of this product. Fill it in here. If this box is blank, the fee will be the same as for the first item.
- If you charge by the rates of the US Post Office (USPS), UPS, Fedex… then fill in the Weight box and leave the Shipping Fee box blank.
- If you charge a fixed shipping fee for a product, then you only need to fill in the Shipping fee box and leave the Weight box blank.
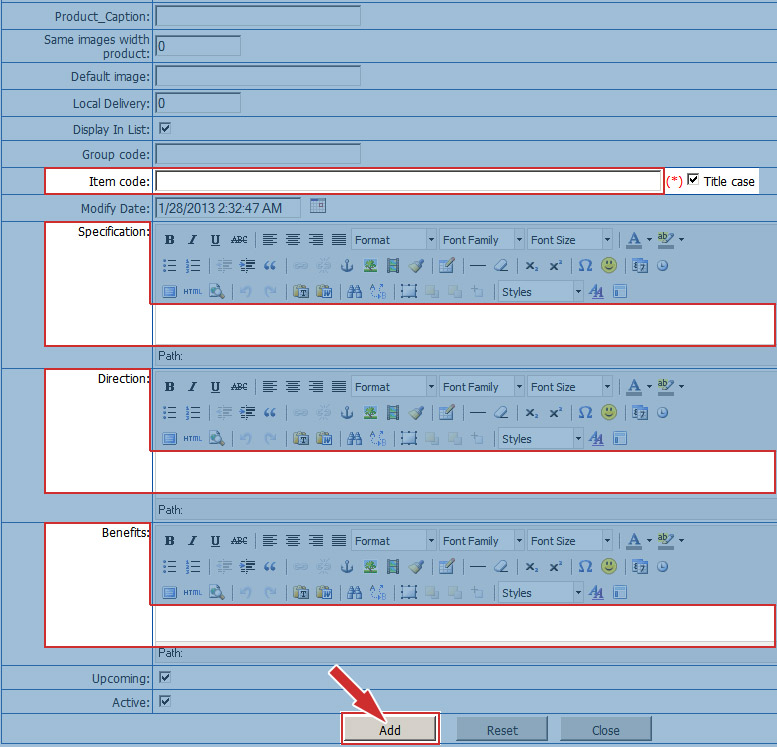
- Item code You must fill in this information. If it is blank, you cannot save this record.
- Specification Here, you will fill in the specifications of the product.
- Direction (or directions for use). Here, you will fill in the directions for use and care of the product.
- Benefits. Here, you can fill in the benefits of the product.
- Click the “Add” button. The message “Record added successfully!” will appear at the upper left corner. And, a blank record will also appear.
B. Step 2: Select a category and upload product image.
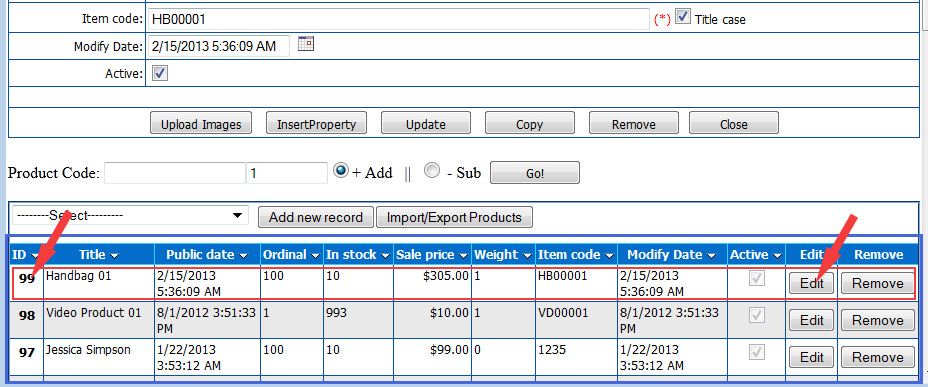
Underneath the record, there always is the list of products. Let’s find the newly added product and click on its ID or the “Edit” button on the same line to open the record.

- Click the “Category” box in the “Map to Product Category” section. The list of category will appear. Find the line with category “Handbags” and click on it. The Category box is now filled with “Handbags”.
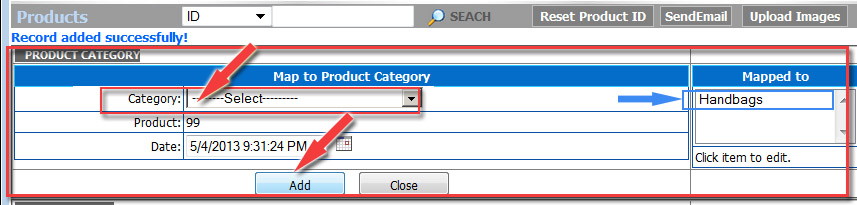
- Click the “Add” button underneath. The message “Record added successfully” will appear at the upper left corner. The category name “Handbags” has appeared in the “Mapped to” section on the right side.
Notes: A product can belong to more than one category. Therefore, you can repeat the previous steps to map this product to another category.
You have finished selecting category for this product.
- Prepare to upload product image to the website.
With each product, you can upload one or more images. In this example, we will upload one image. The Control Panel has a function to resize your original image to create a series of images from tiny image, thumbnail image and standard size image to be used in various places in the website.
Before uploading, you must prepare a large image (the size should be at least 1024 x 768 pixels) to show the details of the product. Your website has the area zoom function to quickly show the detail of an area of the product.

- Click the “Upload Images” button near the bottom of the record. Note that this button is near the bottom of the record, not the button near the upper right corner.
The “Product Image Upload” will appear.
The top part of this screen is for embedding text on the image.
In the lower part, you will a find a box named “Upload to folder”. This box is showing ”Product”, which means the folder “Product” is being selected. Let’s select a suitable folder for this product.
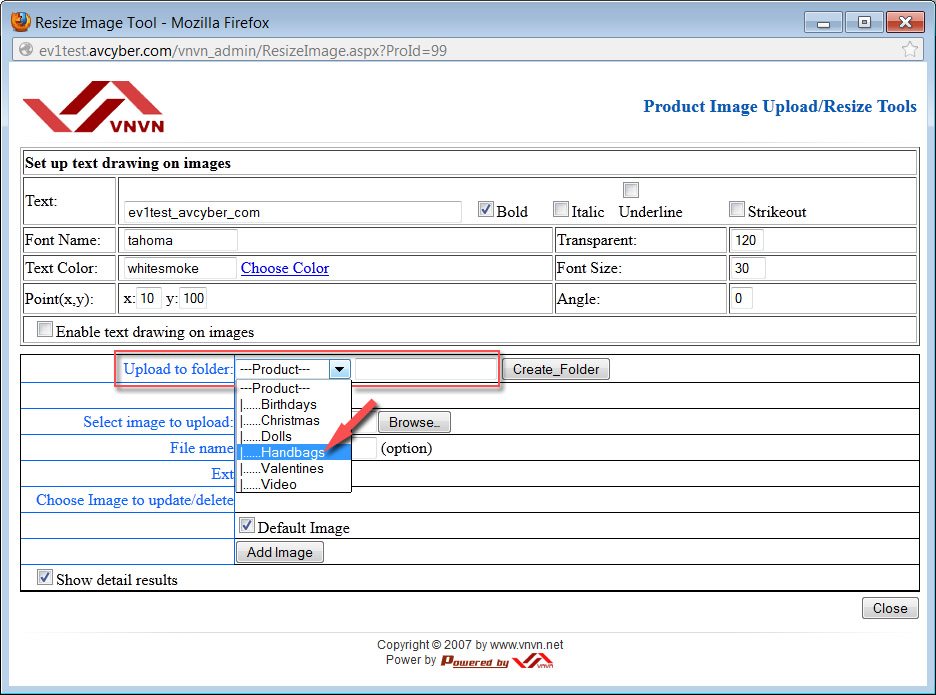
- Click on “Upload to folder” box, a list of folders in the web server will appear. Click the line with “Handbags” to select this folder.

Next, you will find the image file in your computer to upload.
- Click the “Browse” button at the end of the box named “Select Image to upload”. You will see the files and folders in your computer.
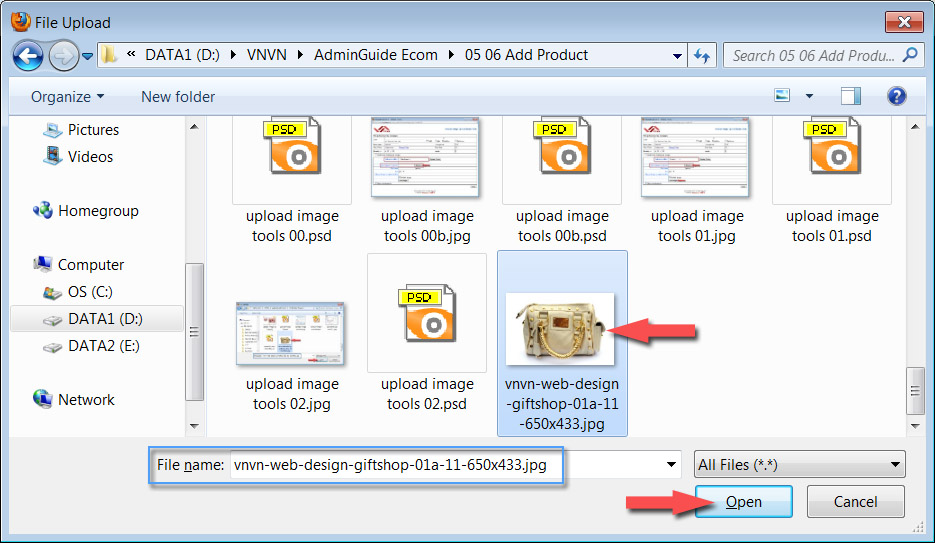
- Click on the image file. The file name will appear in the “File name” box. Then, click the “Open” button.
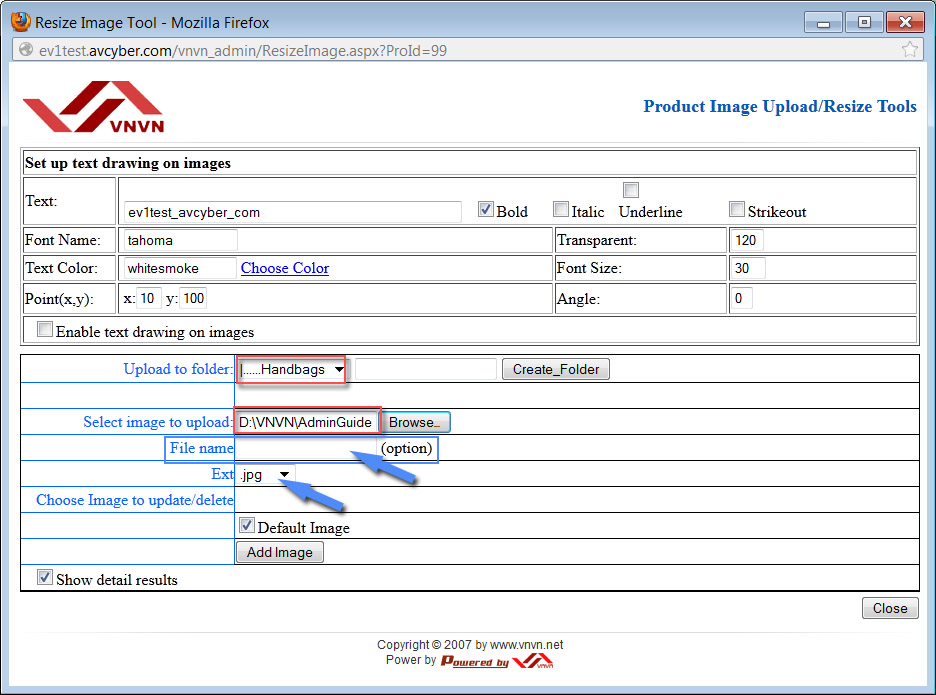
The box “Select file to upload” has been filled in.
- The File name. box. You may fill in a new file name here if you want to rename it. If this box is blank, the file name is unchanged.
- The Ext box. Keep the image format as default, which is JPG.
- Click the “Add Image” button to upload.
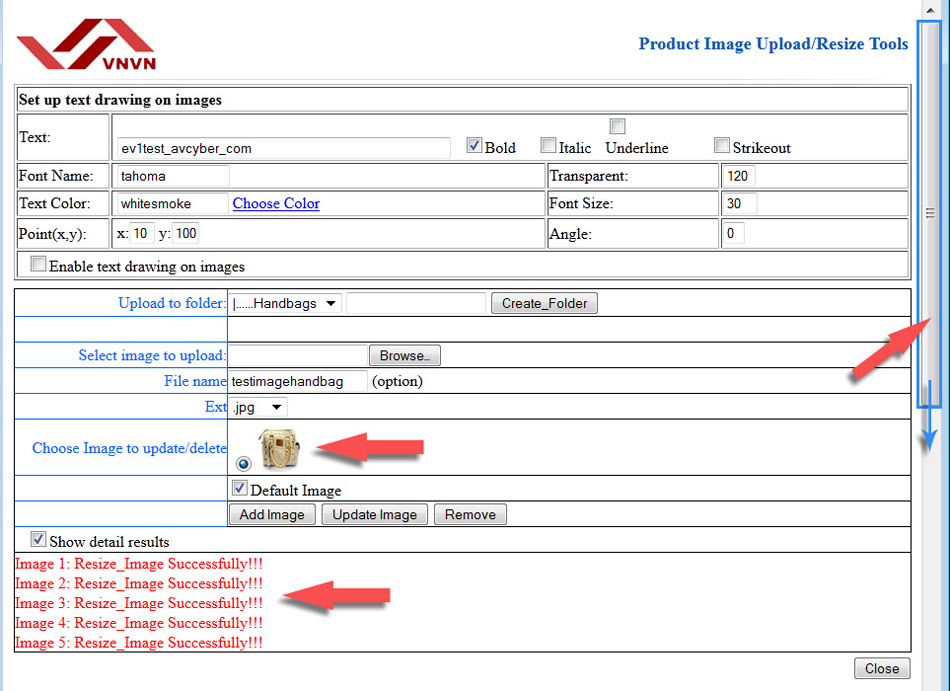
After a few seconds, a small image will appear and the message “Resize_image successfully” will appear several times.
Use the scroll bar to look at the lower part of the screen. You will see a series of images of the product in different sizes.

- Click the “Close” button at the bottom of the screen or in the middle of the screen to close the “Upload” screen.
You will be back to the record. The “Default image” box is now filled with the file path and a small image will appear.
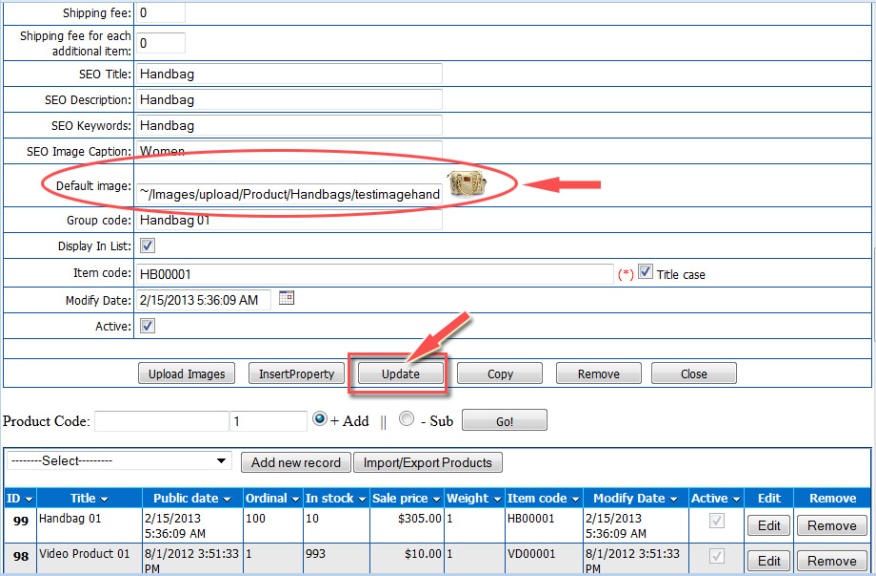
- Click the “Update” button to finish.
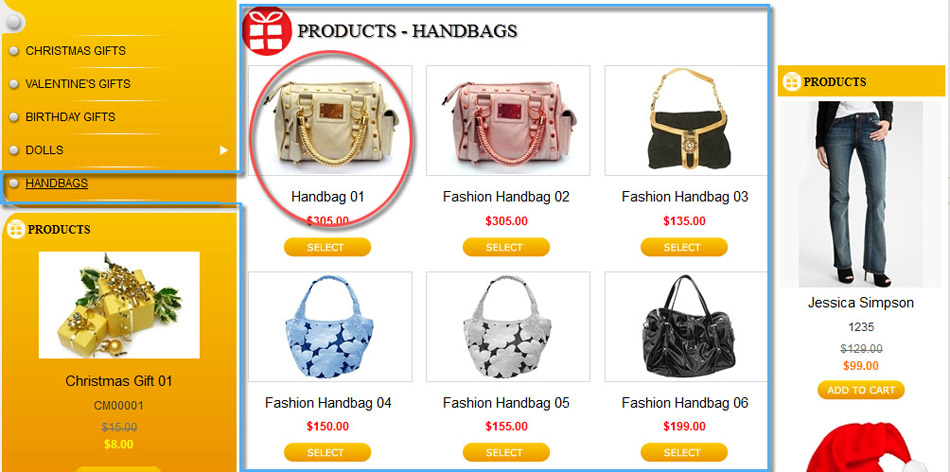
Click on the product, you will see the product with an image and all the details.
Until now, you have finished adding a product to the website.
Gửi ý kiến của bạn
%7Cutmcsr%3D(direct)%7Cutmcmd%3D(none)%3B%2B__utmv%3D852510266.-%3B)