 |
(View file PDF) |
Suppose your website already had a menu item named “Announcements” on the Top Menu.
Here’s how to add an article.
- Login the Control Panel as usual.
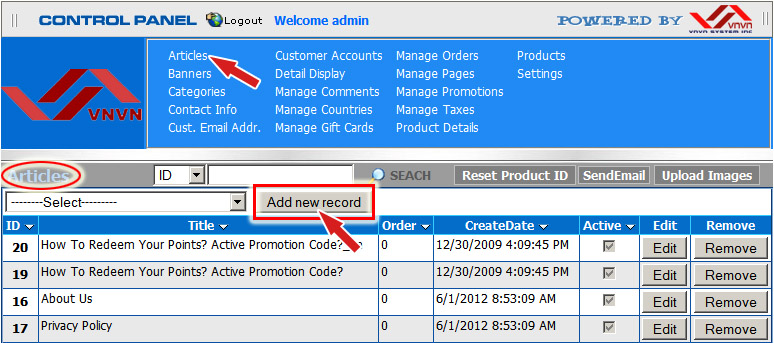
- Click “Articles” on the top menu.
A. Step 1: Create a new article record. You will link it to a category in step 2.

- Click the “Add new record” button. A blank record will appear. Fill in the following boxes.
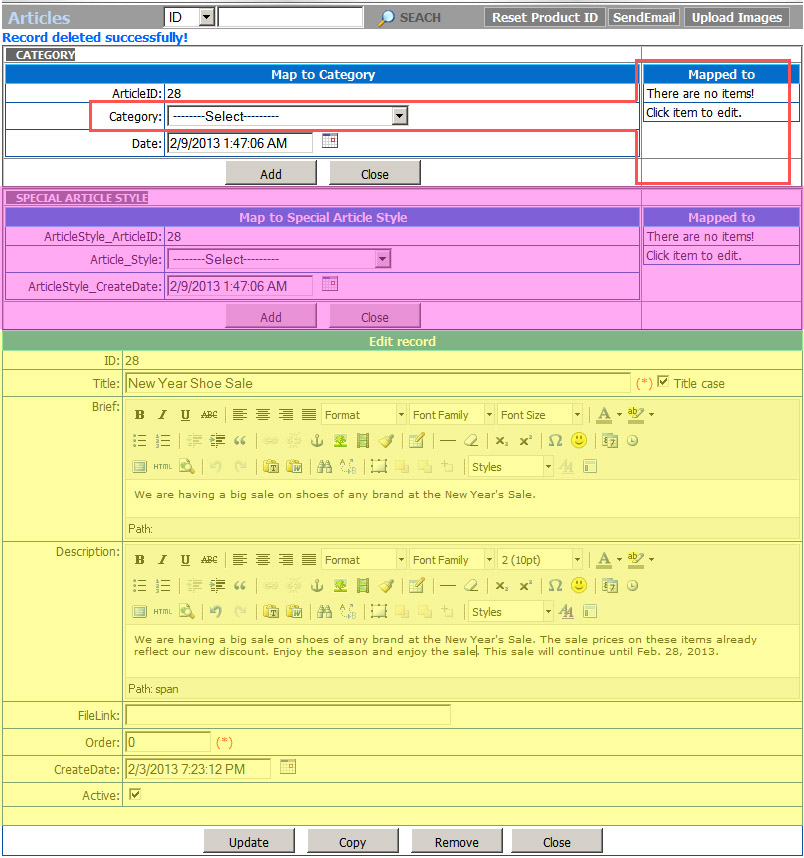
- Title. Fill in the title of the article. On the right side of the Title there is a “Title Case” box. If this box is checked, the first letter of every word you type in here will become capital.
- Brief. Fill in the summary of the article.
- Description. Fill in the article itself.

- Click the “Add” button.
However, the task is not done yet. You still need to map this article to a category, which means to link it to a category.
B. Step 2: Map the article to a category
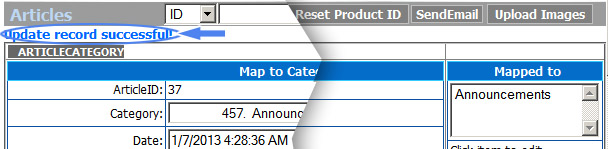
Find the article you’ve just created. It’s the top article of the list in the lower part of this screen

- Click the ID number or click the “Edit” button on the same line with this article to open this record
- Click the Category box. A dropdown list will appear.
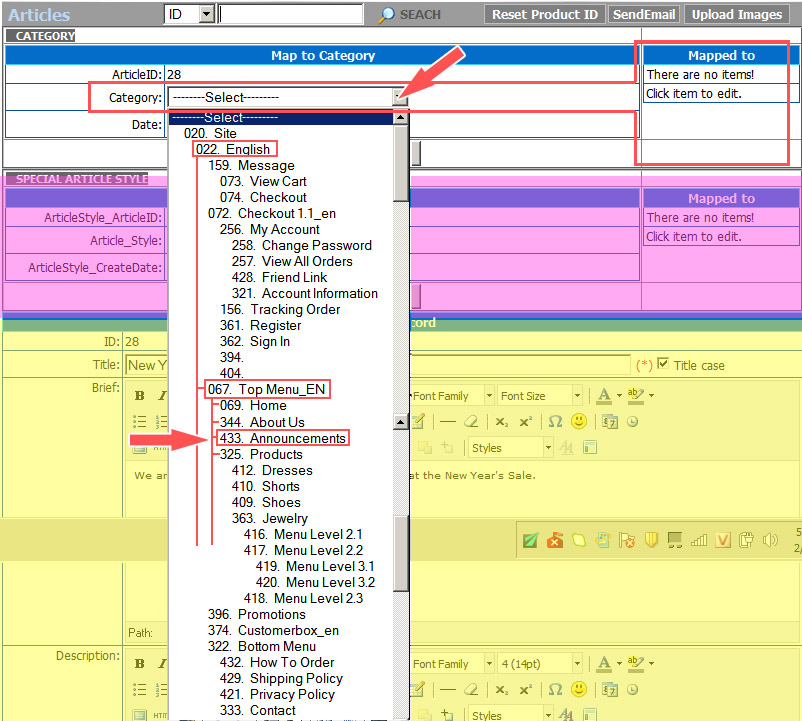
The “Category” box is now filled with “Announcements”.

- Click the “Add” button underneath. This action means you are adding this category to the “Mapped to” list, or link this article to the category “Announcements”.

- To remove a category from the list: Click the category in the “Mapped to” list. Then click the “Remove” button.
- Insert an image in the article.
- Click the “Update” button at the bottom of the record.
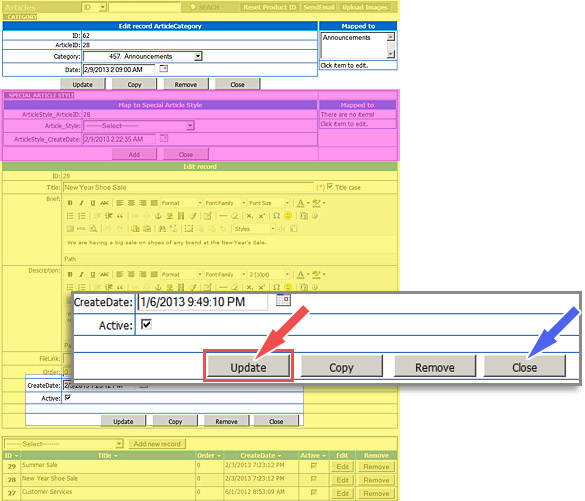
- Click the “Close” button at the bottom of the record. You will be back to the main screen of the Control Panel.
C. Check your website.
- Go to your website.
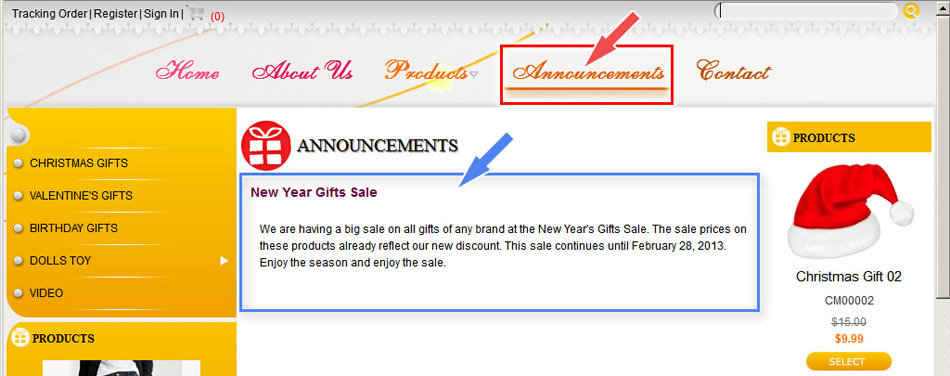
- Click the menu item “Announcements” on the top menu. The article will appear as you see here.
Gửi ý kiến của bạn
%7Cutmcsr%3D(direct)%7Cutmcmd%3D(none)%3B%2B__utmv%3D604939658.-%3B)