- 01. Basic Procedure in Managing Your Webiste
- 02. To Upload a Top Banner to the Website
- 03. To Add a Category to the Webiste
- 04. To Create the Top Menu for the Webiste
- 05. To Add Category "About Us"
- 06. To Add the Contact Page to the Website
- 07. To Add an Article to the Website
- 08. To Insert a Picture into an Article
- 09. To Edit, Delete An Article
- 10. To Add a Category for Photos
- 11. To Add a Slide Show to the Website
- 12. To Edit, Delete a Category
- 13. To Add a Video Clip to the Website
- 14. To Edit While Viewing the Web Pages
- 15. To Change the Display of an Article List
- 16. To Change the Display of an Article
- 17. To Place an Advertisement on the Website
- 18. Display Types for Advertisements
- 19. How To Layout Your Homepage
- 20. To Show, Hide And Edit The Special Boxes
- 21. Search And Filter Tools In The Control Panel
- 22. To Setup Default Sizes For Images
- 23. To Insert a Video Clip Into An Article
- 24. To embed a Youtube Video in your Website
- 25. To Post a Book on Your Website
- 26. To Post a PDF book on the Website
 |
(Download PDF) |
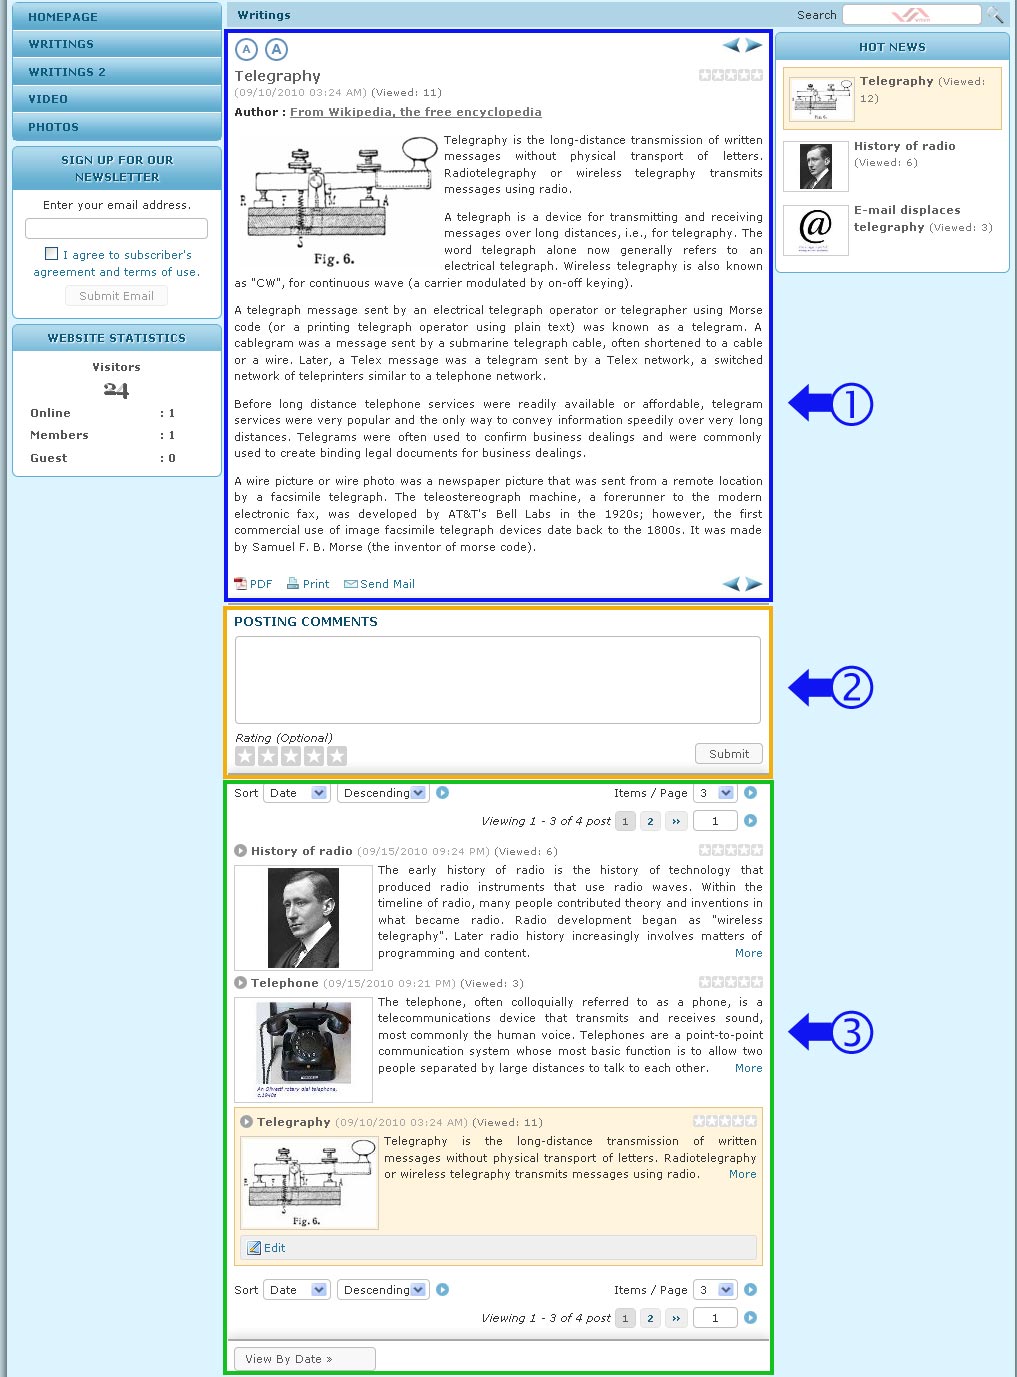
When a reader clicks on an article title, he will see the detail page of this article. This page has some extra elements. You need to edit the category that contains this article to turn on or off these elements. The changes will be applied to all articles in a category. You cannot make changes for just one article.
The detail page usually displays 3 sections:
- The article itself.
- The Comment box and rating scale.
- A list of other articles in the same categories.
A. To enable or disable the Comment box and the rating scale.
In this example, let’s assume that you have logged in the Control Panel, selected the “English site” and have opened the record of category “Writings”. The record looks like the following picture.
1. To enable or disable the Comment box, go to the Properties section near the top right corner. Find the "Allow Comment" box.
- Uncheck the box to disable it. The detail page will not display the Comment box as well as the rating scale.
- Check the box to enable it. The detail page will display the Comment box.
- Uncheck the box to disable it. The detail page will not display the rating stars. The rating scale will not appear under the comment box.
- Check the box to enable it. The detail page will display the rating stars. The rating scale will appear under the Comment box.

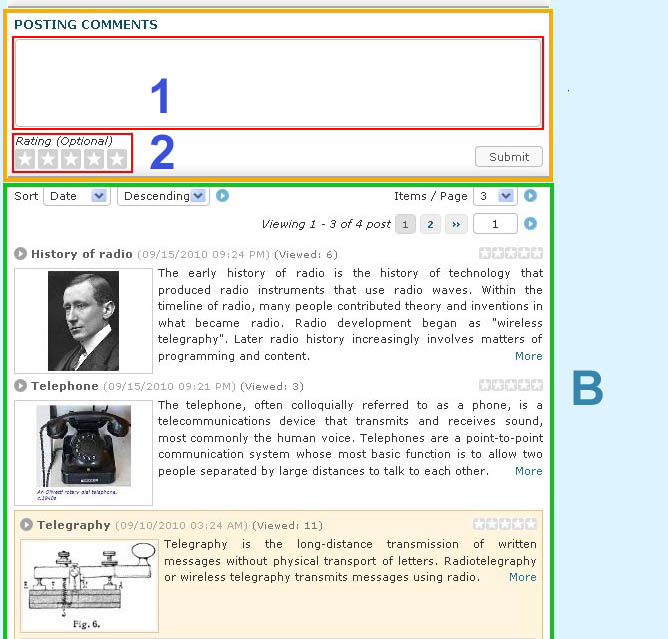
B. Enable or disable the list of other articles.
This cannot be turned off. The list here will look the same way as the list page of the same category.
C. Elements of the article itself.The content of an article (or any news, video, etc.) is displayed here. Beside the content, there are extra elements that we will explore here.
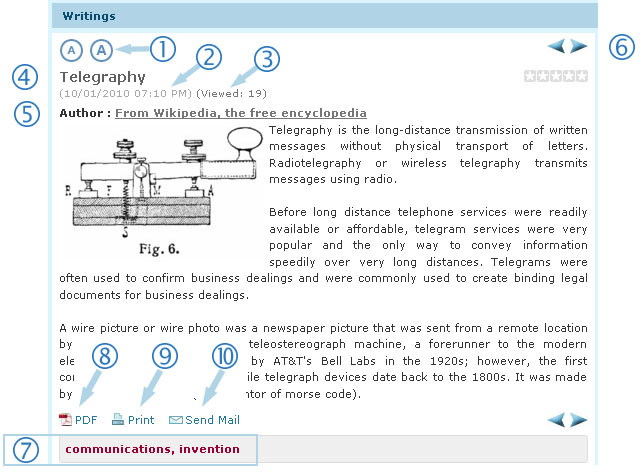
1. Text zoom buttons. These buttons allow viewers to enlarge or reduce the text size. You can turn these buttons on or off.2. Date and time posted. You can choose to display only the date or hide the time and date completely. This information will be displayed or hidden on both the list and the detail page.
3. Number of view counts. You can choose to show number of viewers who have read this article. This information will be displayed or hidden on both the list and the detail page.
4. Title. You can show or hide the title of the article.
5. Author. You can choose to display or hide the author of this article.
6. Navigation buttons (Next/Previous article). These buttons let the reader go to the next or previous article without having to return to the list. These buttons can be turned off.
7. Keywords (or Tags). You can choose to display the keywords or not. If you enter some keywords (tags) in your article record, it will display any keywords that match the keywords of other articles. When a reader clicks on a keyword, he will see the other articles.
8. PDF icon. This function lets the reader save the article in the PDF file format. The PDF file or Acrobat file is the format created by Adobe Corporation which can be viewed by most computers in the world.
9. Print icon. This function lets the reader print this article on paper.
10. Send Mail icon. This function lets the reader email this article to a friend. He will actually send the link of this acticle.
D. To change the detail display of an article, you will do as follow.
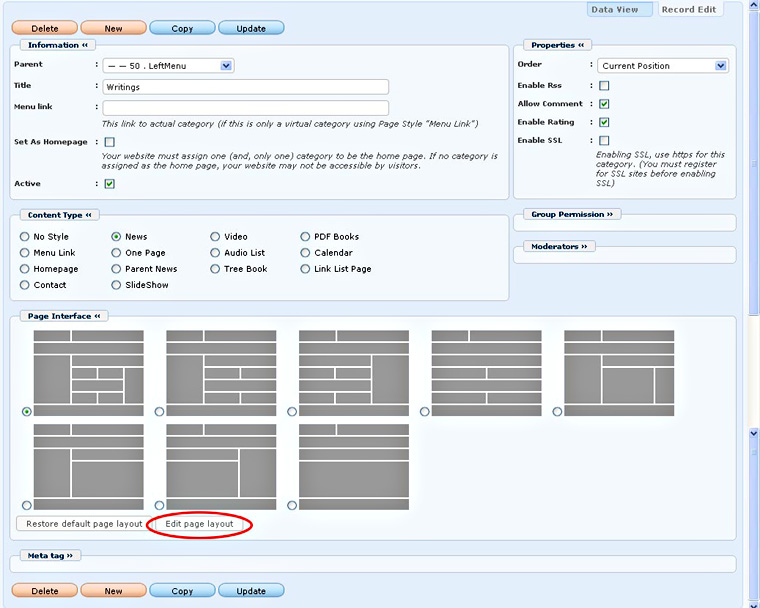
2. Go to the Page Interface section and click on the "Edit Page Layout" button. You will enter a screen like the following.
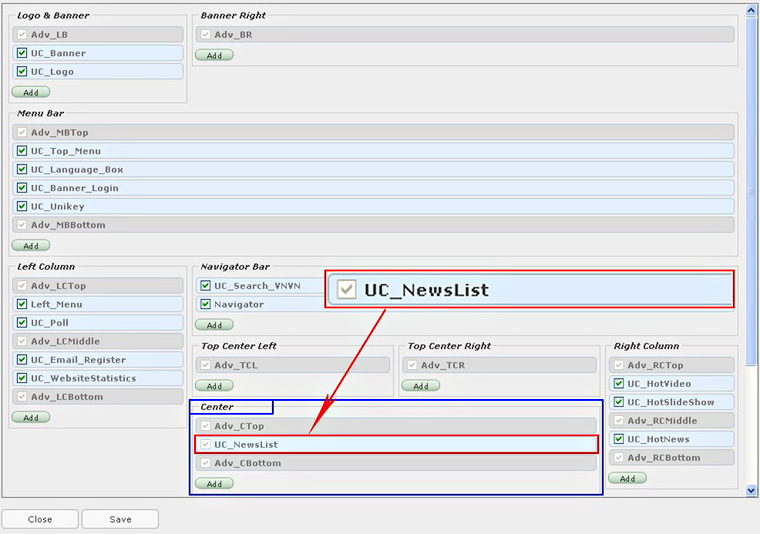
This section contains 3 elements.
- Adv_CTop. This is the advertisement element at the top position of this section. (Adv_NewsList stands for “Advertisement at Center Top”). You can disable it by un-checking the box. It is advised to leave it as is.
- UC_NewsList. This is where the List of Articles will be displayed. (UC_NewsList stands for “User Control News List”). NOTES: This is also the position for the Detail Page of an Article. You should not uncheck the box.
- Adv_CBottom. This is the advertisement element at the bottom of this section. (Adv_NewsList stands for “Advertisement at Center Bottom”). You can disable it by un-checking the box. It is advised to leave it as is.
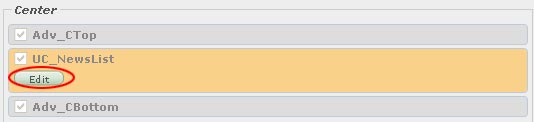
5. Click the “Edit” button. A screen will appear with many options.
Use the scroll bar to go to the bottom of this screen. You will edit some elements in the “List Displaying Options” section and the "Show Extra Information" section.
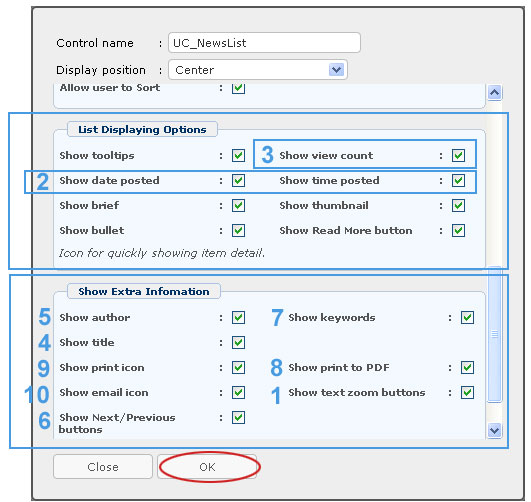
6. The purposes of these elements have already been explained previously. You can turn on or off any of these elements as necessary.
7. When you have finished editing these elements, click the "OK" button at the bottom of the screen. Note: Do not click the “Close” button unless you want to cancel all the changes.
8. You will be back to the “Edit Page Layout” screen. You need to click the “Save” button to save the changes you have just made. Note: Do not click the “Close” button unless you want to cancel all the changes.

You will be back to the record of the category.
10. Go to your website and check if the Detail Page of the article is displayed to your liking. You must refresh the page to see the changes you have just made.
%7Cutmcsr%3D(referral)%7Cutmcmd%3D(none)%3B%2B__utmv%3D652366270.-%3B)